|
|
|
How
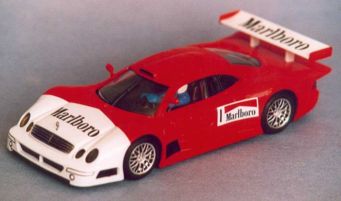
to Repaint, by David Lawson.
|
|
|
I thought it might be helpful to talk in some detail about preparing and spraying a slot car bodyshell in an attempt to demystify the process and encourage more people to have a go themselves. There is a lot of pleasure to be had from racing a car in your own personal colour scheme and I’m convinced that psychologically it can be worth a couple of tenths a lap!  Stripping down the body To start at the very beginning the first task is to remove all the trim and detail from the bodyshell. I use Tamiya plastic cutters and an Exacto model knife for this. All the slot car manufactures fix the small detail parts by melting over excess material into holes and slots in the body, by snipping off the resultant lump on the underside you may loosen the part sufficiently to gently ease it off. If it is still attached then repeatedly scrape the model knife blade across the joint gradually removing the material but not digging into the actual depth of the plastic body. This can take a few minutes for each component but results in all the pieces coming off in good condition and minimal marking of the car body. Work carefully and slowly and never be tempted to force a detail part, once it’s separated put the piece in a polythene bag or a margarine tub for safe keeping. Having stripped
down the shell - all the original decals, stickers or Tampo printing
need to be removed, this is to ensure that the surface will be smooth
and even for the new paint. Don’t be tempted to spray over tampo printing,
however well the paint covers, you can usually still see the shape of
the logo in the paint finish. With all of this work remember to work in circular motions and as lightly as possible to avoid flattening out any of the contours of the bodywork. Once all
the decoration is removed wash the body in a strong solution of washing
up liquid and brush it all over with an old toothbrush to clear all
the debris from panel lines and recesses – don’t forget to also scrub
out the debris from the inside of the shell as well – you don’t want
particles floating out and onto wet paint during spraying.
Rubbing
Down Well done, if you’ve resisted the temptation and waited, you now have a clean dry body ready for painting. Priming
For a solid colour finish, prime the car with Halfords grey or white auto primer. Shake the can for at least two minutes to ensure the propellant and the paint are thoroughly mixed, only spray outdoors when it is not a cold and damp day and when there isn’t much breeze or where you have a sheltered corner of your garden. If there
is any breeze, paint with your back to the direction it’s coming from,
this allows the spray to keep it’s shape and work efficiently in undisturbed
air – obviously the fumes are also carried away from you.
|
|||
|
Painting
|
|||
|
Masking All
the above work will produce a good finish in a single colour. Should
you be carrying out a repaint with a two or more colour paint scheme
then obviously you will need to mask off areas of the bodywork as you
add subsequent colours. My preferred method is to spray the primer coat followed by the lightest colour and then leave the shell for at least two days to allow the paint to harden, if you mask paint within 24 hours of the previous coat you can damage the surface with the tape adhesive. There are
two ways of masking areas. It is important that the very edge of the tape is in perfect contact with the surface and to ensure this my method is to place the beginning of the tape onto the bodyshell and then work along the line to be masked in small amounts gently pressing the tape down evenly while ensuring that there is no tension in the tape caused by pulling at it. This allows the tape to follow the contour of the bodyshell without kinking or pulling. At panel lines, gently push a cocktail stick onto the tape so that it seats snugly in the recess before continuing along the next panel, this usually is successful in helping the mask to be a perfect fit. I’ve found that most small bleeds of paint under the tape are around door or bonnet shut lines where the masking tape has been stretched across the gap between the two panels. When you have finished the important mask line between the two colours you can mask off the rest of the base colour that you wish to protect from spray with any cheap masking tape. Always ensure there is about at least 5mm overlap between strips of tape to ensure a good seal and also be careful to mask around the bottom edge of wheel arches and wings. Don’t forget also to tape over from the inside of the bodyshell any holes such as windscreens, windows, air ducts or where headlights fit – overspray will find it’s way anywhere if you’re not careful. Just before the actual spraying have a final look at the edge to make sure nothing has lifted while you’ve been handling the bodyshell and also that no fibres have been trapped between the tape and the surface, although tiny they can leave an annoying mark if you don’t spot them. After spraying this second colour wait for about half an hour, un a knife blade along the masked join before removing the masking tape. Be careful not to handle the fresh paint, although by now completely touch dry, it will need a couple of days to harden in readiness for decaling or further masking for subsequent colours.
|
|||
|
Finishing
The final paint finish is dictated by various factors. A modern F1 or Sports GT will look most realistic with a fairly high gloss appearance as befits the commercial era of the sport, pre war and classic cars will vary from scruffy through to concours so you will have to judge from your reference material the finish required. The other factor is a personal one, some cars you may wish to have appearing realistic and others to have a ‘toy like’ feel with exaggerated bright and shiny colours, it’s very much a personal thing and whatever looks good to you is right as you are the only person that you need to satisfy. To achieve my finish I usually polish out some or all of the imperfections with Mer car polish, this is not too aggressive and should be applied with a soft cloth in a gentle circular motion to avoid cutting through the paint. This polish is also decal friendly, some other polishes give a finish that decals don’t adhere to completely. Usually I complete the job with a couple of coats of Halfords clear lacquer to lock in the decals to reduce the risk of chipping and to give that extra shine, be careful when lacquering over decals to make the first coat very light and leave to dry for at least ten minutes to ensure the decal isn’t softened and damaged. Subsequent coats shouldn’t affect the decals at all. |
|||
|
Conclusion None of this process is difficult, it is just a matter of taking time and care. Your results will improve with each respray and you’ll get a bit more ambitious each time but whatever the result you will end up owning a unique model. David
Lawson
|
|||
|
|