|
|
|
Recasting
in resin made simple by Joel Thura.
|
|
|
|
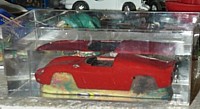
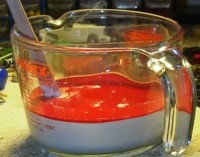
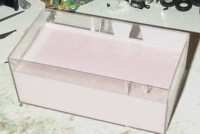
If like me, you have been thinking of recasting your favorite car, but don't know where to start. Here is a simple guide to help you. The technique I am about to describe involves a simple one part mould, into which you pour resin and slosh it around until all sides are covered. First of all, select your subject. Try and pick something original or rare. Fill the body with "Plasticine" , indenting all the body openings. Build a ridge at the bottom about 5mm high, make it slightly smaller than the car, this will give a nice lip to your mould, and will stop the resin spilling out as you slosh it around. Next you need to fing a suitable way to create a mould, I find the easiest way is to use a Ninco or Fly box lid turned upside down. Silicon rubber is expensive, you do not want to use more than you should. Having placed you car in the mould, pour water until the car is covered by about 8mm. Pour the water from the mould back into an empty measuring jug! You can now find out how many CC of silicon you need to create the mould. |
||
|
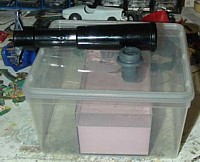
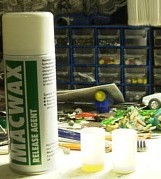
Dry everything thouroughly! Spray release agent on both. In a glass jug (easy to clean) mix the correct amount of silicon, let it rest for 20 mns to allow bubbles to rise, and pour very slowly onto your car. At this point, I try to remove bubbles by the following method: Place the new mould in an airtight container, make a hole in the lid, and, using a little vaccum pump designed to remove air from opened wine bottle called a "Vacuvin", suck the air out. This will allow bubbles to rise quickly to the surface, and prevent air from spoiling your finished mould. Wait for a whole day at least for the silicon to set. |
|
||
|
|
Have a cup of tea, or a stiff drink. You are half way through the whole process. Gently, release the mould from the box lid, take your time. Turn it upside down, and equally carefully remove the car body from the silicon mould |
||
|
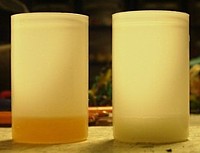
When you have recovered, you can tackle phase 2. To create the recast, you need to slosh resin around the inside of the mould. Because it sets very quickly, you cannot do the whole car in one go. Back to the mould release agent, spray the inside of the mould. Use empty film canisters (Fuji make nice see-through ones) to measure the correct amounts of resin. Use about 5mm of each material, mix it thouroughly, and pour in the mould. Slosh it around the bottom and the nose. Once set, (about 2mns), start mixing your next batch (using another set of film cannisters) and pour it in. This time do one side and the rear of the car. You may need to repeat the process 3 or 4 times to get the correct thickness all around your car. At times you will need to turn it nearly upside down to make sure the bottom of the recast is not too thin. Do not delay between coats, or your body will set in separate layers which will delaminate when you try and work on it later on |
|
||
|
|
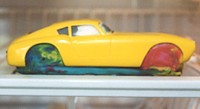
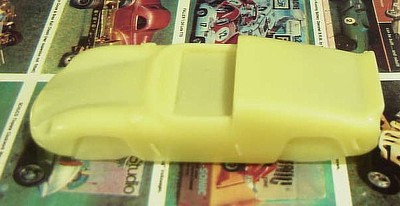
Time for another stiff drink. Wait, even if the resin seems set, it will be pliable, and might distort when you try to remove it from the mould. Wait at least 2 hours and very gently, prize your new creation out of its mould. And just to show you its easy, here is one I made earlier. Joel |
||
|
|